Analyzing the JBoss Remoting Protocol
Analyzing the JBoss Remoting Protocol
In this article, I’d like to introduce the remoting-wireshark (see remoting-wireshark) project. This project is a Wireshark (Wireshark · Go Deep.) dissector plugin that can decode the JBoss Remoting (see JBoss Remoting) protocol.
Here is the screenshot that shows the running Wireshark that is decoding the JBoss Remoting protocol:
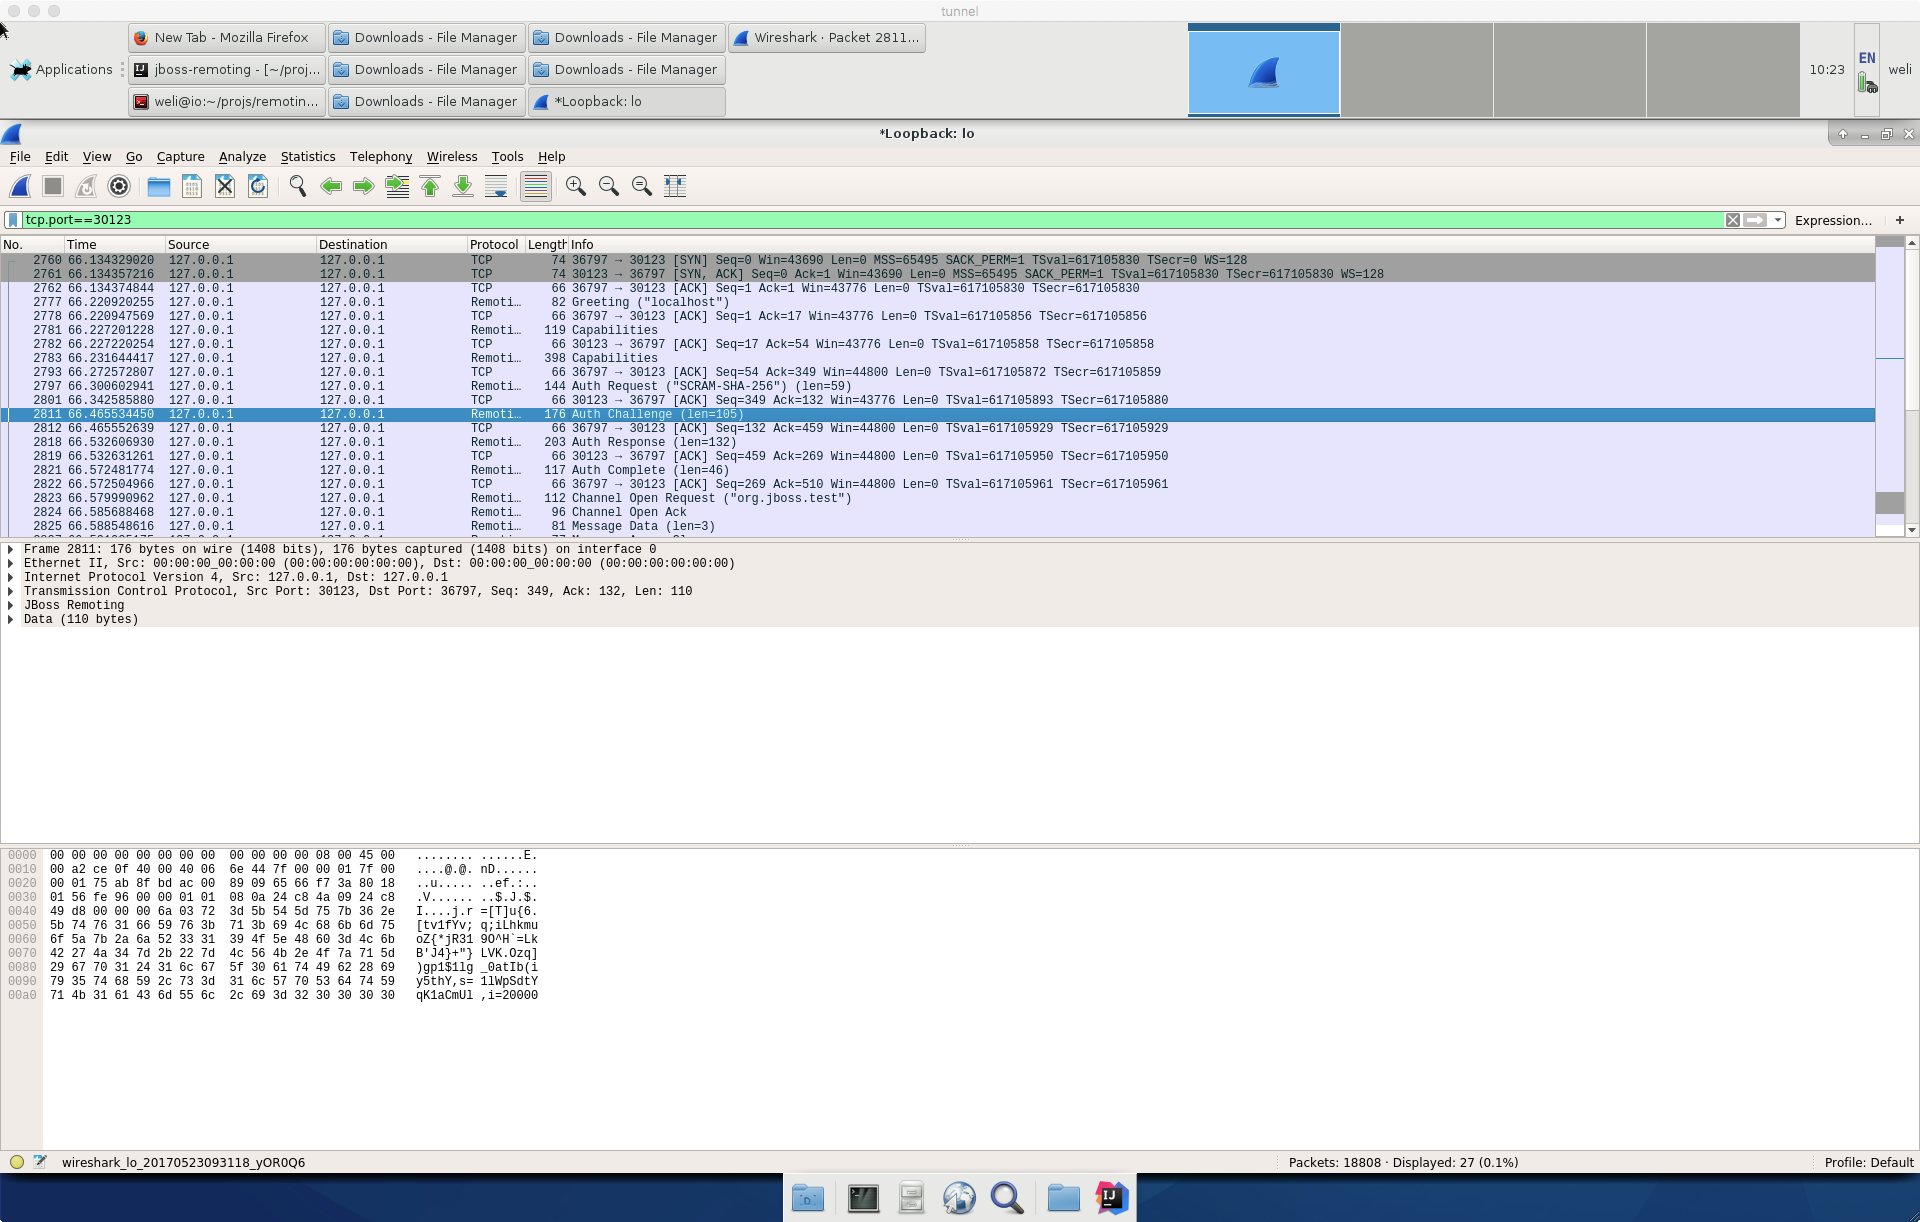
From the above screenshot, we can see the Remoting protocol is decoded by the Wireshark.
Now let’s see how to enable the plugin. Firstly, you need to clone the remoting-wireshark from Github into your local machine. Here is the URL of the project:
https://github.com/jboss-remoting/remoting-wireshark
After cloning the above repository, we can see the code of the project:
$ tree
.
├── Makefile
├── src
│   └── main.c
└── target
From the above output, we can see the project just contain a main.c and a Makefile. The Makefile does not work on all the platforms at the time of writing. I have tested the Makefile on my 64-bit Linux box, and the Linux distribution I am using is Fedora 25:
$ cat /etc/*release
Fedora release 25 (Twenty Five)
At time of writing, there is a bug in the project which causes the plugin broken in Wireshark 2.x. I have submitted a PR to fix it (PR3) and you can apply the patch if you are running Wireshark 2.x.
Here are the Wireshark packages provided by Fedora Linux:
$ dnf search wireshark*
Last metadata expiration check: 23 days, 20:55:45 ago on Sat Apr 29 13:43:24 2017.
wireshark-qt.x86_64 : Wireshark's Qt-based GUI
wireshark-gtk.x86_64 : Wireshark's GTK+-based GUI
wireshark.x86_64 : Network traffic analyzer
wireshark-cli.x86_64 : Network traffic analyzer
wireshark-devel.x86_64 : Development headers and libraries for wireshark
openambit-wireshark.x86_64 : Wireshark dissector for openambit
libvirt-wireshark.x86_64 : Wireshark dissector plugin for libvirt RPC transactions
The above packages will provide Wireshark runtime and necessary header files and libraries for us to build the remoting project. To compile the project, we can run the make command in the project directory, and here is the output:
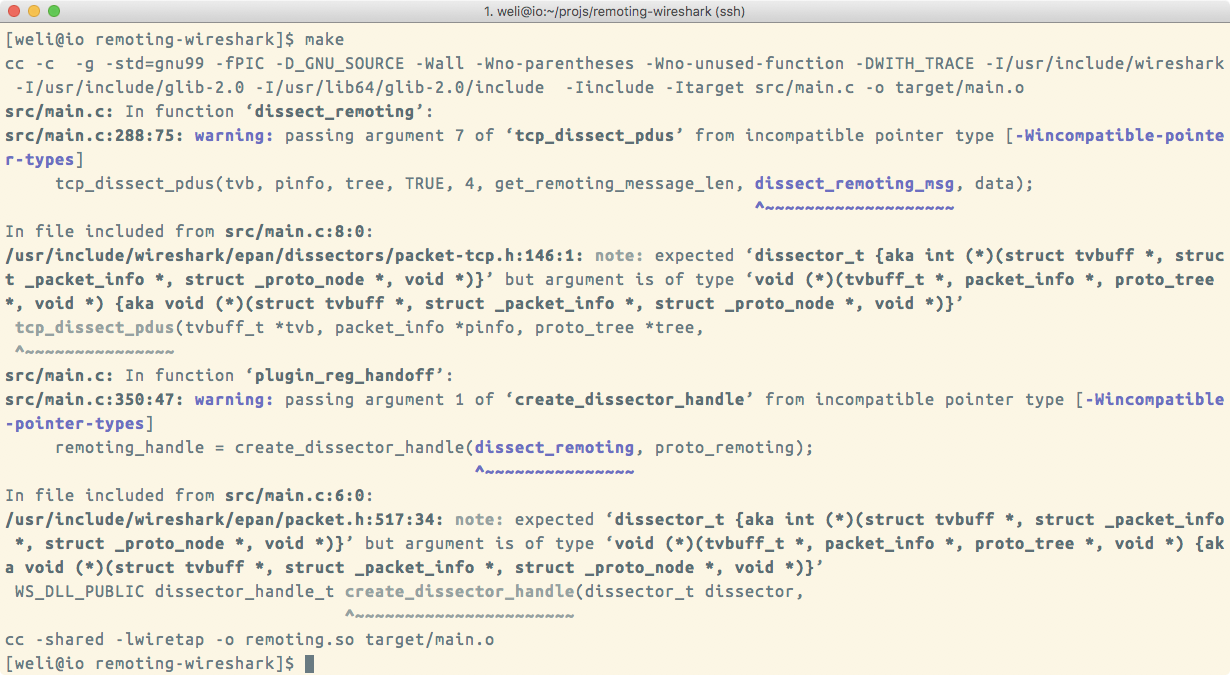
The above screenshot displays the compile process of the package, and the final output is remoting.so. Here is the relative output:
$ cc -shared -lwiretap -o remoting.so target/main.o
After the compilation is done, we need to put remoting.so into the plugin directory of the Wireshark. Here is the command to do so:
$ sudo cp remoting.so /usr/lib64/wireshark/plugins/
The above command will put the remoting.so into the wireshark plugin diretory defined by Fedora Linux. After the plugin is installed, we can start the Wireshark, and if everything goes fine, the plugin will be loaded. We can check the Analyze tab in the menu and select the Enabled Protocols... item. Here is the screenshot:
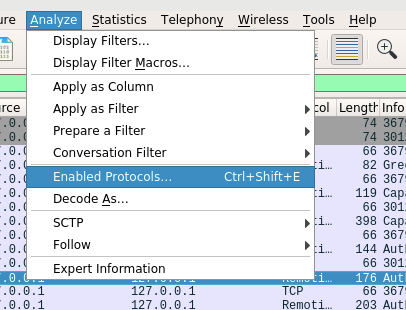
After clicking the above item, we can see the Enabled Protocols window. Here is the screenshot:
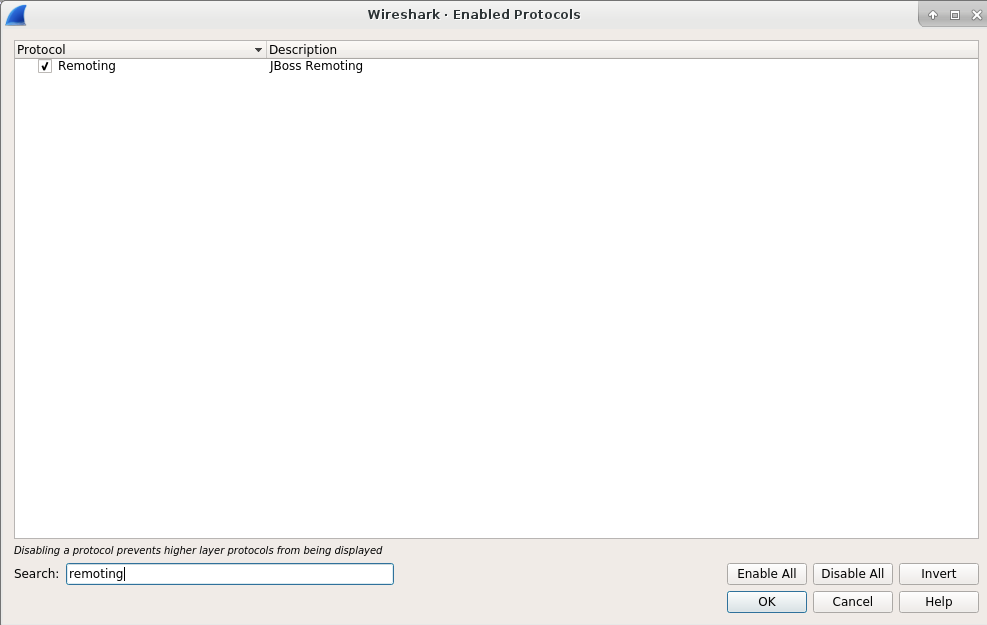
The above screenshot shows the enabled protocols. Wireshark will enable many protocols by default, so I have to put the string remoting into the Search field, and it will only show the Remoting protocol. This process verifies the installation of our remoting.so plugin.
To test the plugin, we can use the jboss-remoting project itself generate some network traffic and let Wireshark capture it. Here is the URL of the project:
https://github.com/jboss-remoting/jboss-remoting
You can clone the project and use the mvn install command to compile and install it into your local machine. I won’t dive into many details of these steps because they are quite straightforward. After the compilation is done, we can run the ConnectionTestCase provided by the project to generate the network traffic. Here is the screenshot of the class:
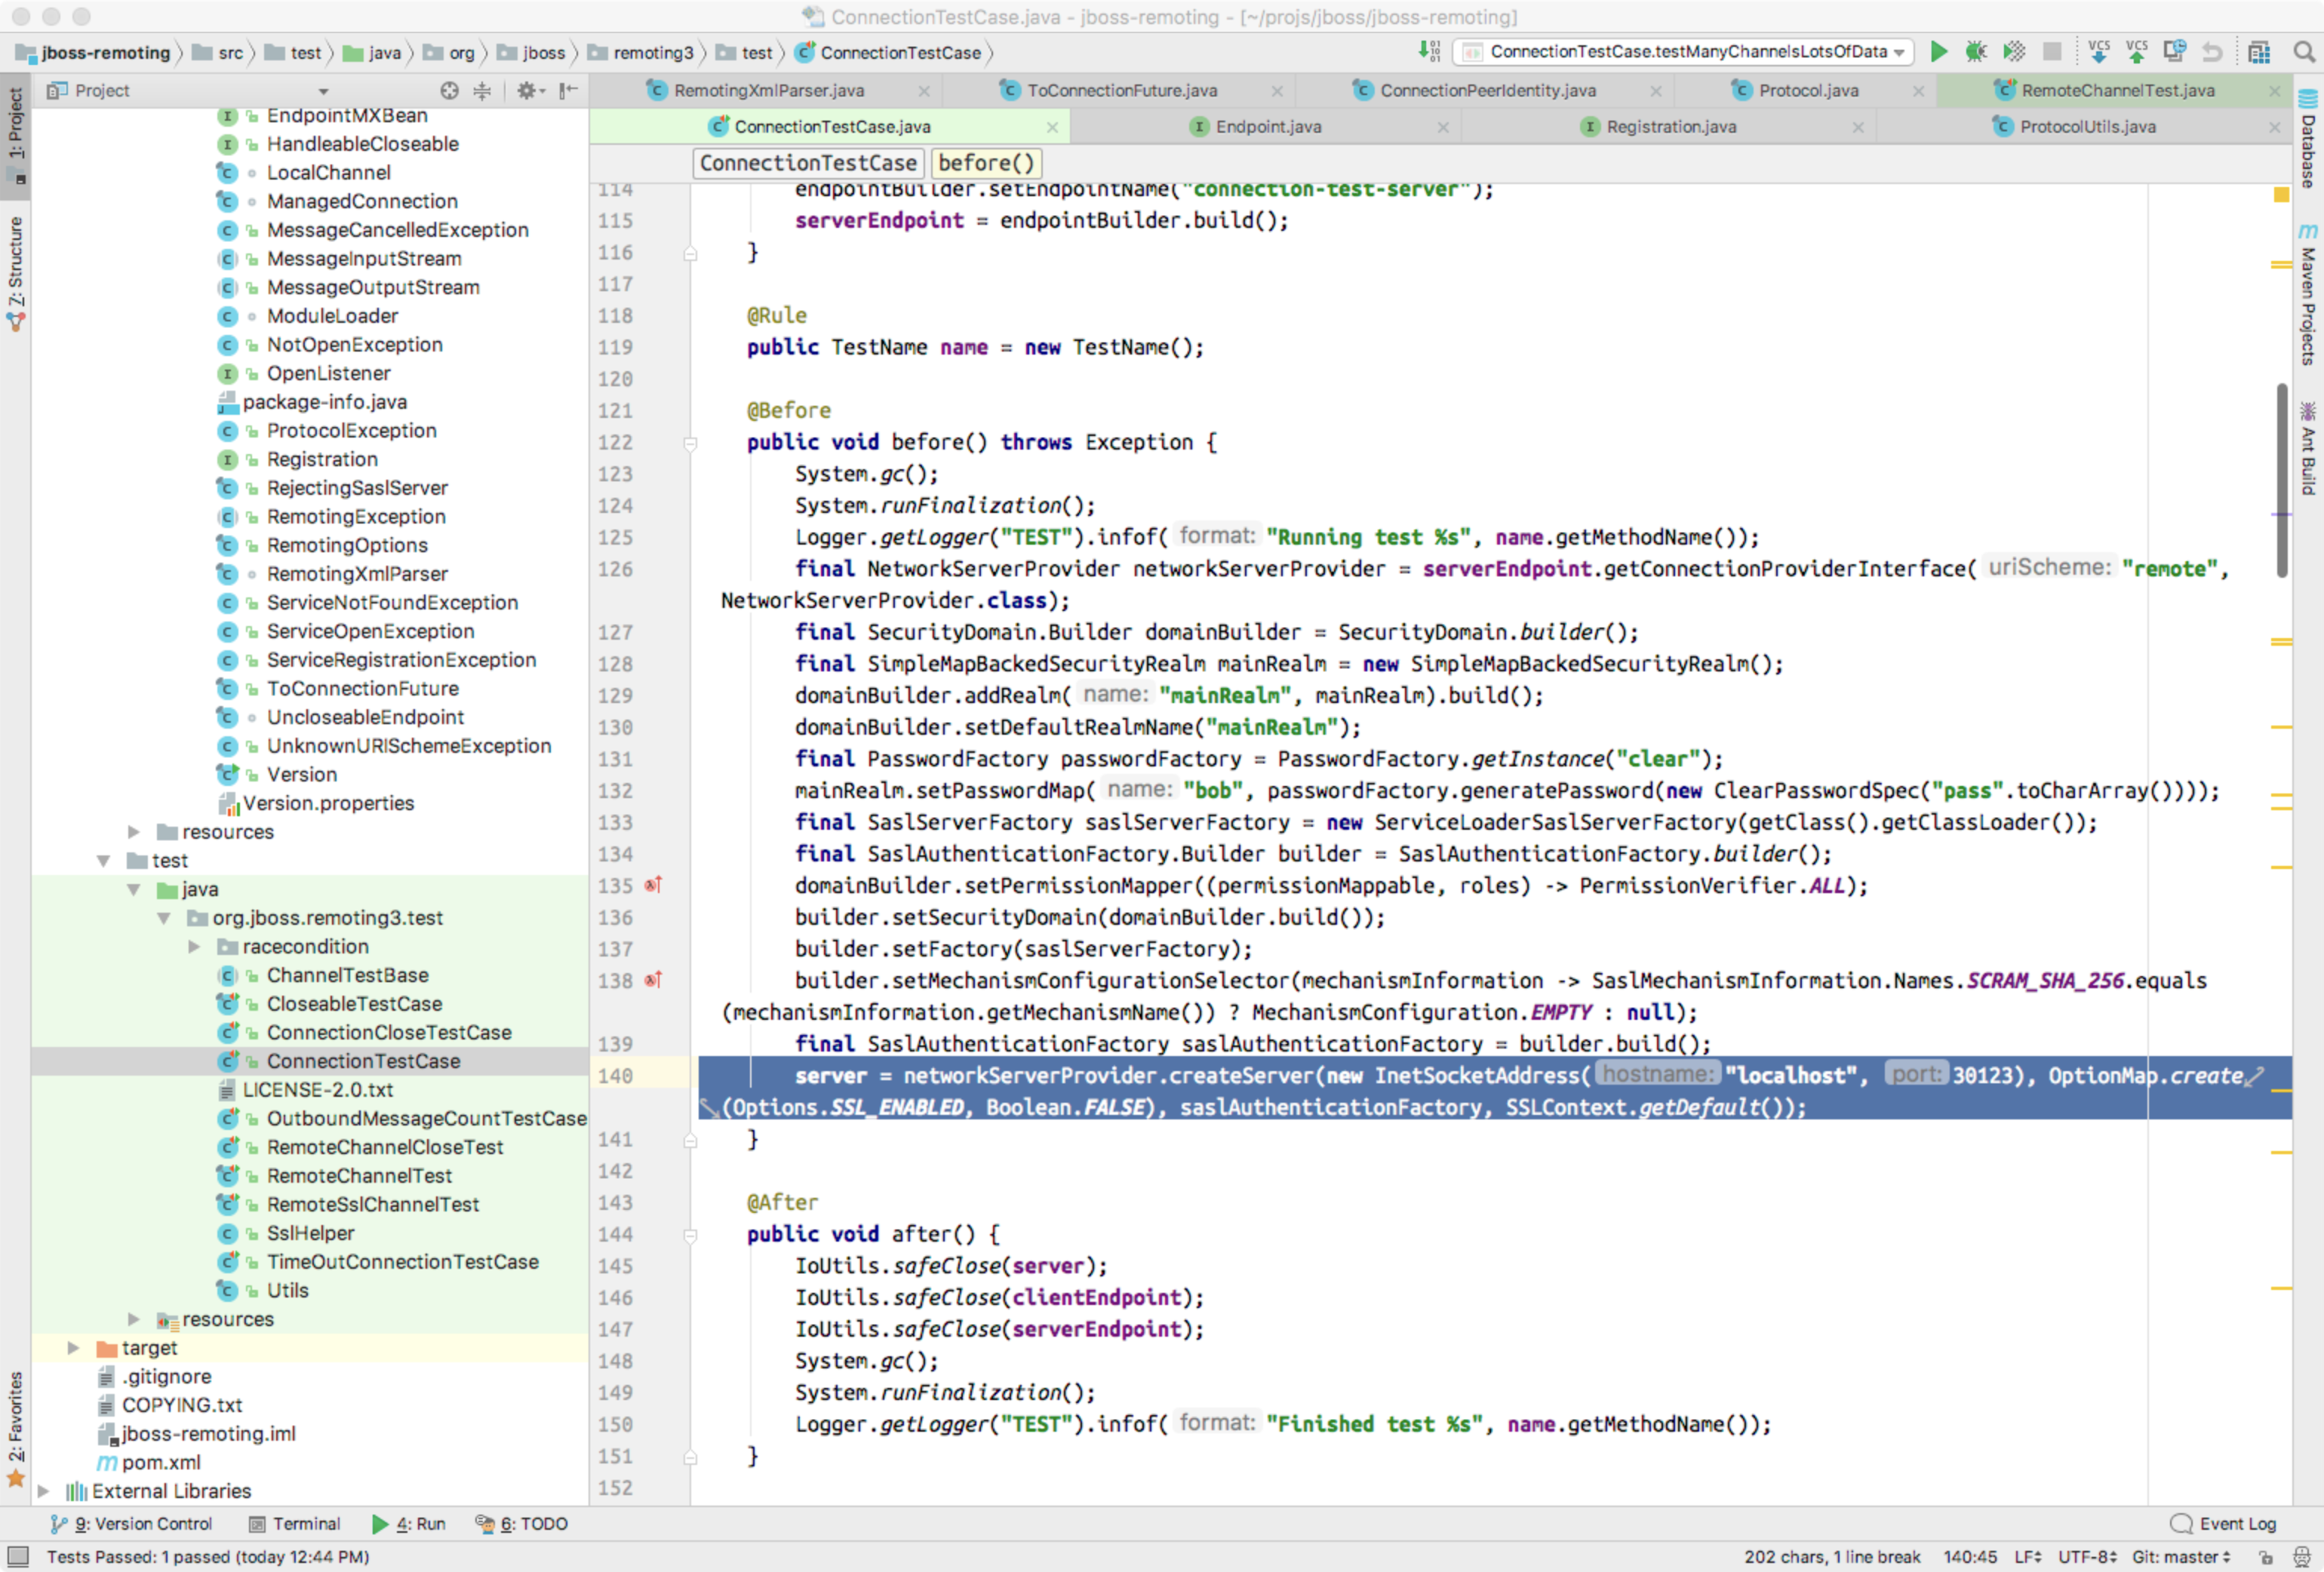
The above screenshot shows the tcp port used by ConnectionTestCase class is 30123, so we can set Wireshark to listen to lo loop interface and filter the data packet to show the data transferred via tcp port 30123.
To select the interface to capture, we can select the Capture -> Options... item as shown in following screenshot:
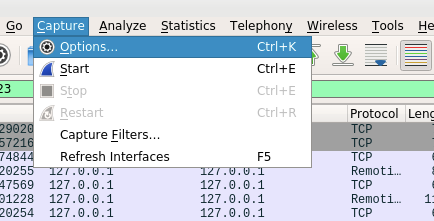
After clicking the above item, we can enter the following window:
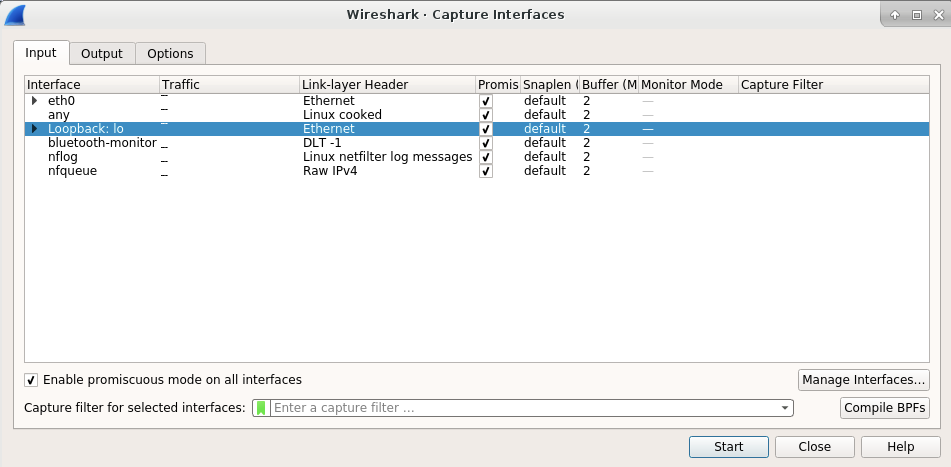
In above window, we can select the lo interface for data capturing. After selecting the interface, we can click the start button in above window to start the data capture. Then we will enter the main window of the Wireshark and see data are captured for lo interface. Now we need to write a filter to show the data on port 30123 only. Here is the filter setting:
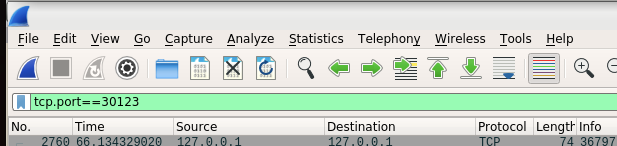
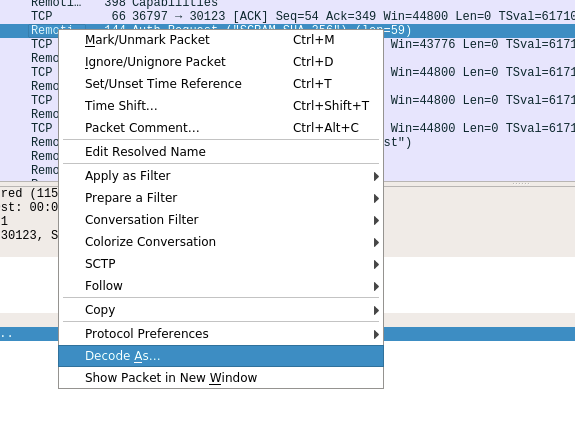
Now the Wireshark is prepared to capture the network data. We can run the ConnectionTestCase in jboss-remoting project, and it will transfer the network data with Remoting protocol. In Wireshark you can see a lot of data packets captured, but they are just decoded as plain TCP packets. Now we can right click one of packet to display the popup window, and select the Decode As... item. Here is the screenshot:
After the clicking the above item, you can see a drop menu that can be used to choose the protocol for decoding. Here is the screenshot:
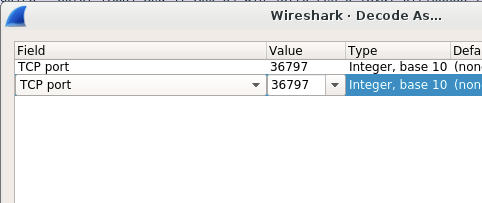
And then you can click the TCP port and a very long droplist will appear. You can select JBoss Remoting as the protocol, and then the packet will be decoded correctly.
After the above steps are done, you will see the JBoss Remoting packets displayed in Wireshark window as shown at the beginning of this article.