macOS环境下设置kubernetes的dashboard
首先从下面的网站下载docker for macOS,并在本地安装好:

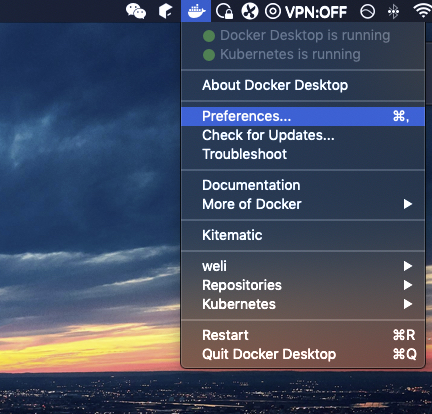
安装好以后,启动docker desktop,然后点开Preferences:
选择Kubernetes,点选Enable Kubernetes:
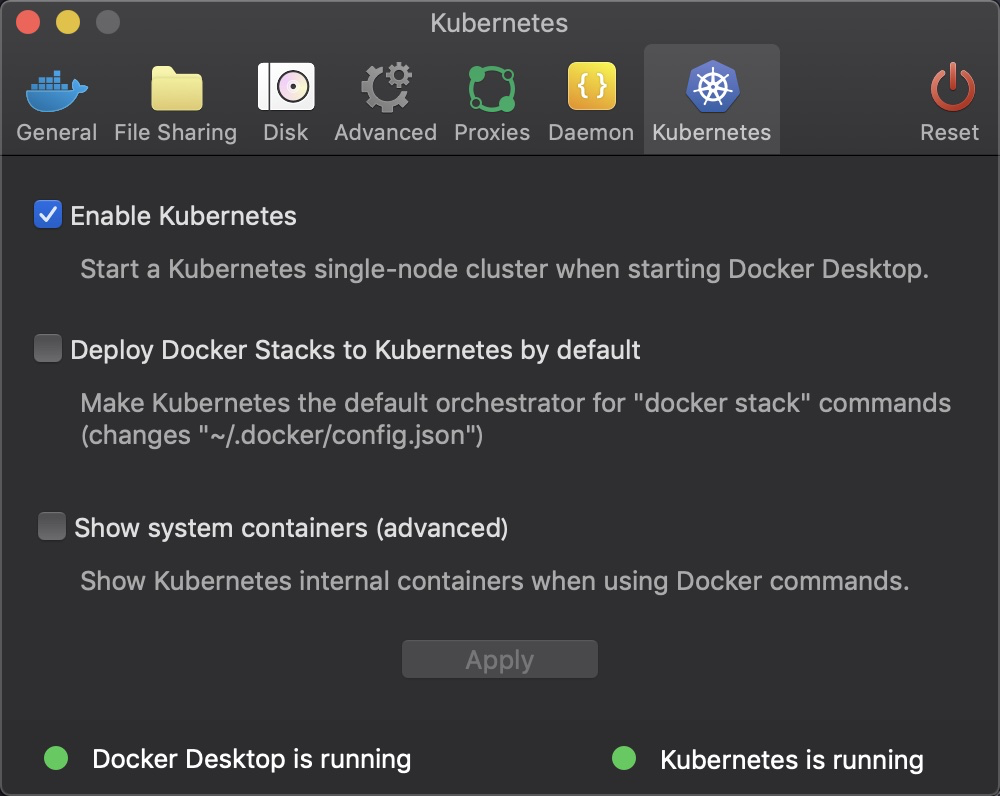
等待重启完成,看到上面的截图,右下角的Kubernetes is running。
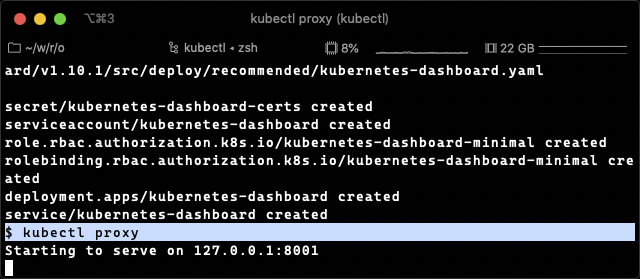
此时执行下面的kubectl命令来安装dashboard:
$ kubectl apply -f https://raw.githubusercontent.com/kubernetes/dashboard/v1.10.1/src/deploy/recommended/kubernetes-dashboard.yaml
下面是执行过程及结果:
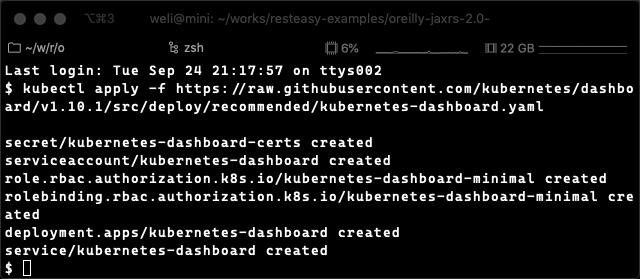
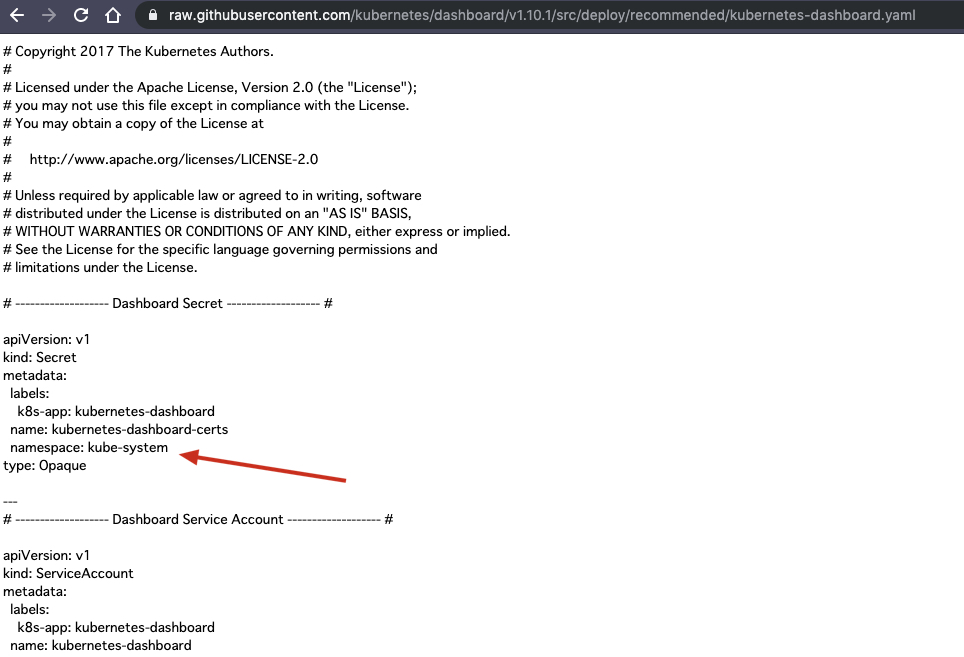
可以看见dashboard被创建了。如果进一步查看上面使用的yaml文件,可以看到dashboard默认配置的namespace是kube-system:
接下来启动proxy:
$ kubectl proxy
Starting to serve on 127.0.0.1:8001
下面是启动状态:
这样就可以通过proxy,使用浏览器访问dashboard服务:
http://localhost:8001/api/v1/namespaces/kube-system/services/https:kubernetes-dashboard:/proxy/#!/login
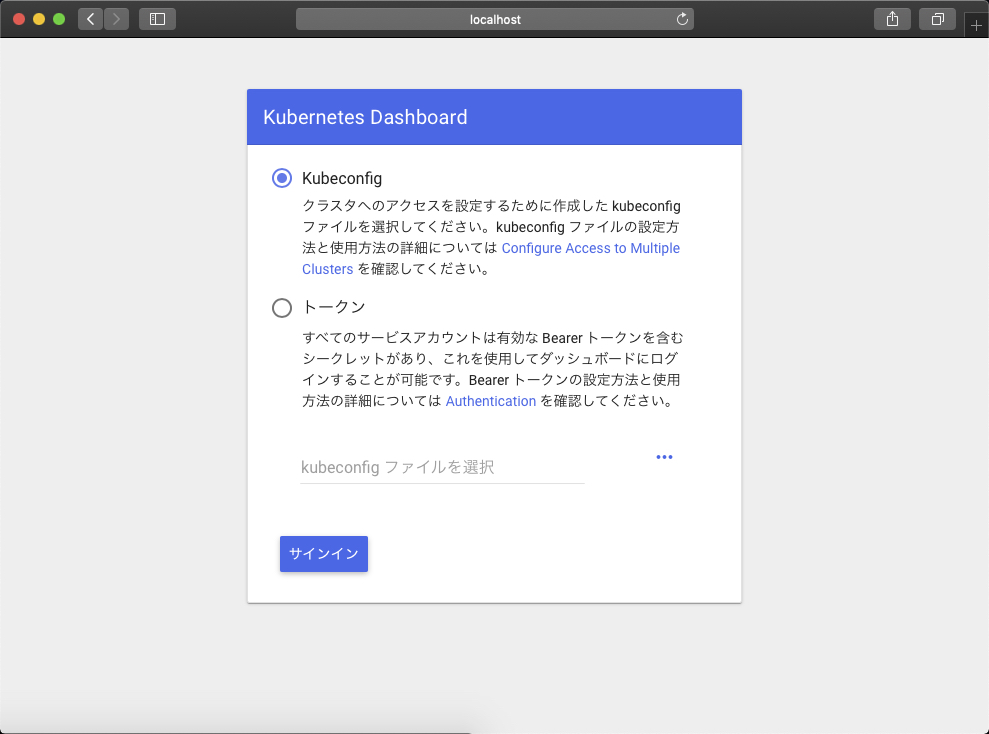
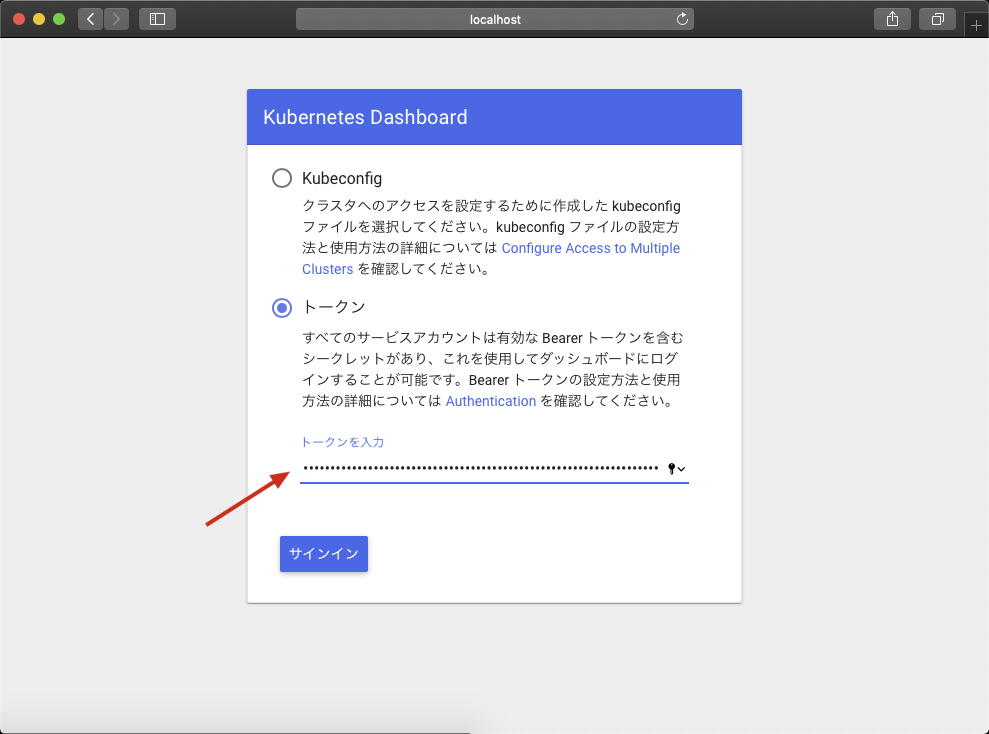
上面提供两种访问方式,我们使用第二种token的访问方式:

这个方式需要我们输入token,所以我们需要得到token。使用下面的命令获取token:
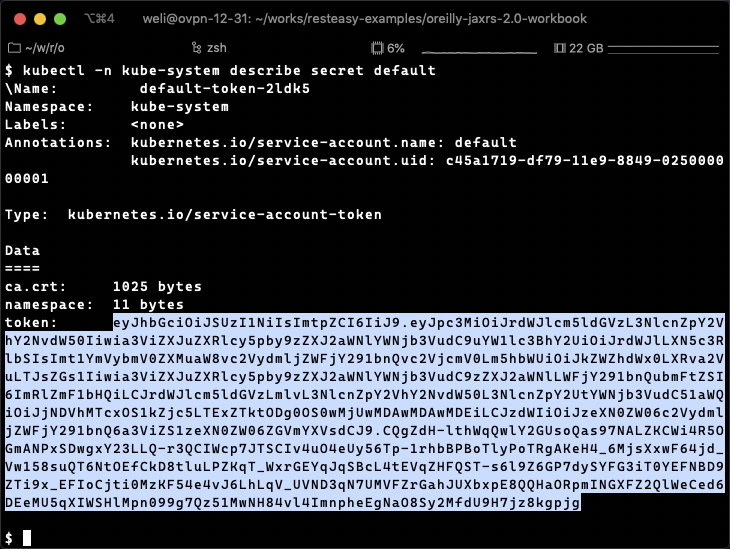
$ kubectl -n kube-system describe secret default
运行上面的命令,得到token和其他信息:
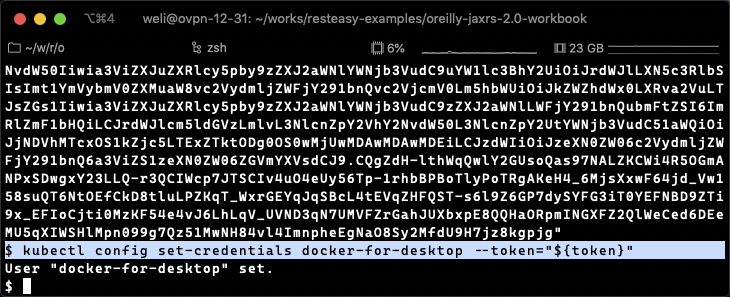
我们把得到的token放进变量:
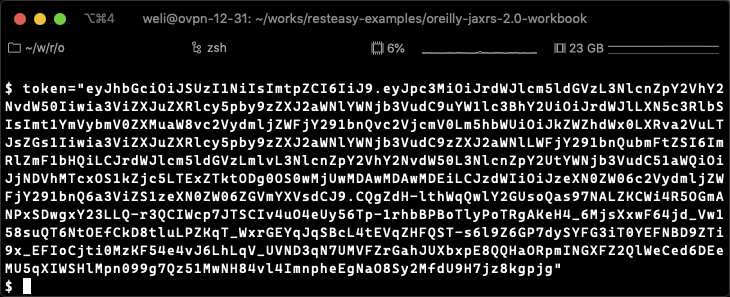
然后使用这个token配置好一个user:
$ kubectl config set-credentials docker-for-desktop --token="${token}"
下面是命令的执行过程和结果:
此时回到dashboard,输入token:
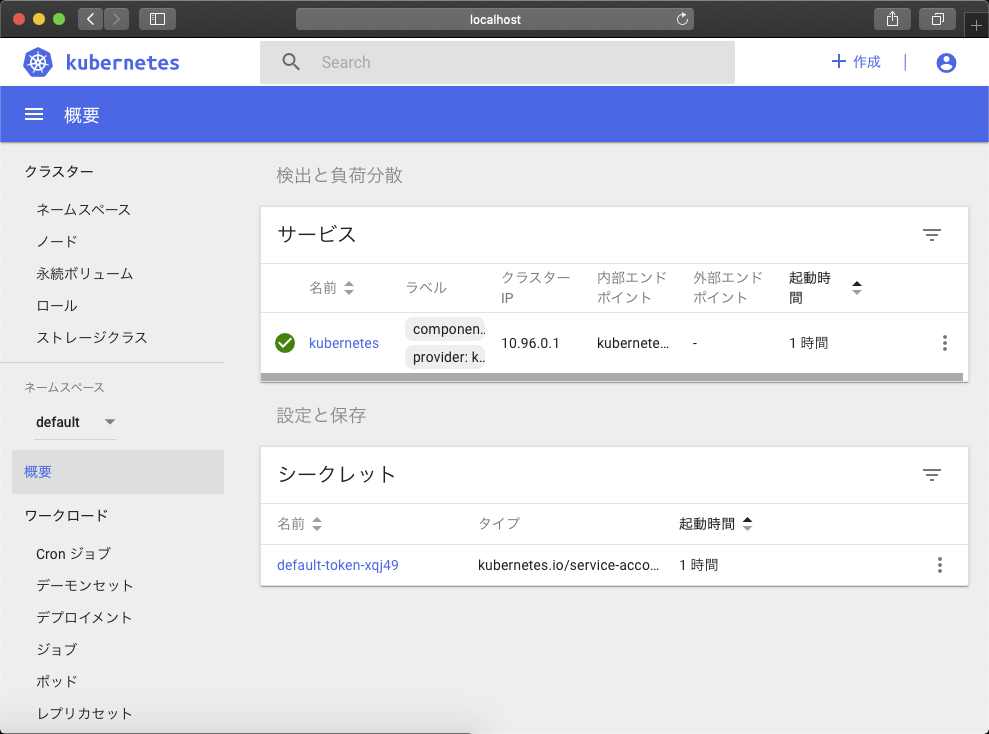
登录完成后,就可以使用dashboard了:
以上是kubernetes dashboard的配置方法。关于dashboard的更多信息,可以查看它的项目README:
- 上一篇 使用ssh和sshfs实现容器内目录的反向映射
- 下一篇 用来学习汇编语言的容器