Using Docker to pull image and then load the image in Minikube
I have introduced how to use the minikube command to download an image manually:
However sometimes this method doesn’t work because of the network problem, so it’s better to use the underling docker command to pull the image manually with proxy set and then load it into minikube.
The minikube can have multiple choices as its underlying engines1. Because I’m using MacOS, and I have installed Docker on my computer, so my minikube installation uses the Docker as its underlying engine by default.
So I can set the proxy in my Docker like this:
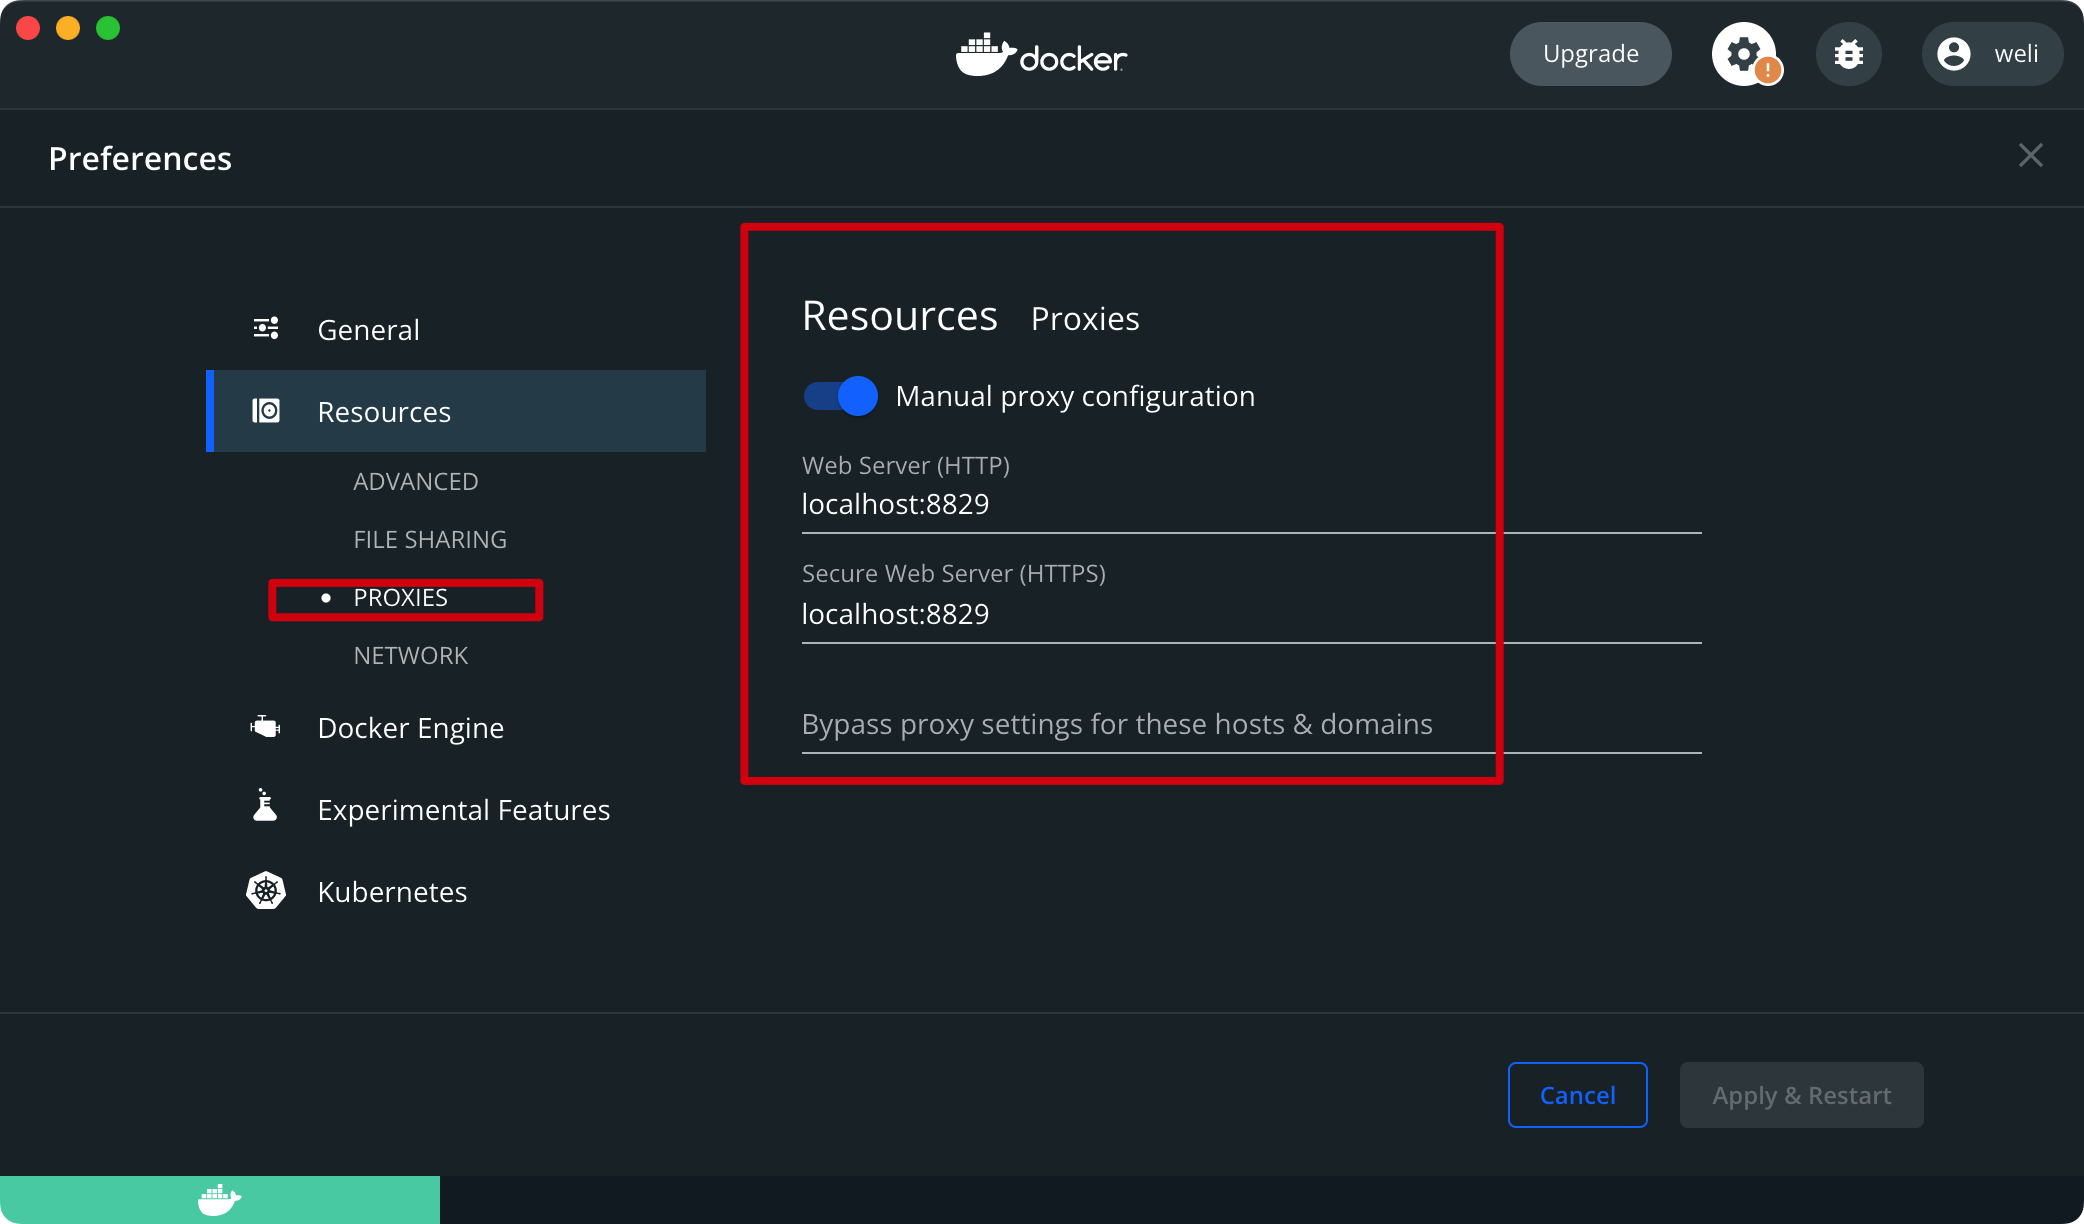
As the screenshot shown above, I have set the proxies to my network vendor’s proxy, thus I can fetch the docker images via proxy. Now I can try to pull a image with the following command:
➤ docker pull jmalloc/echo-server

Using default tag: latest

latest: Pulling from jmalloc/echo-server
Digest: sha256:57110914108448e6692cd28fc602332357f91951d74ca12217a347b1f7df599c
Status: Image is up to date for jmalloc/echo-server:latest
docker.io/jmalloc/echo-server:latest
As the command output shown above, I have used the docker command to pull the image, and because the docker command will use the proxy setting, so it will download the image file via proxy. Now as the image is pulled into my local machine, now I can use the minikube command to load this image. Here is the command to do so:
➤ minikube image load jmalloc/echo-server
After the above command is executed, now we can use this image to create a deployment:
➤ kubectl create deployment hello-minikube1 --image=jmalloc/echo-server
deployment.apps/hello-minikube1 created
As the command output shown above, the deployment based on the pulled image is created. Now we can expose the deployment by creating a LoadBalancer typed service:
➤ kubectl expose deployment hello-minikube1 --type=LoadBalancer --port=8080
service/hello-minikube1 exposed
Here is the created service:
➤ k get svc
NAME              TYPE           CLUSTER-IP       EXTERNAL-IP     PORT(S)          AGE
hello-minikube1   LoadBalancer   10.109.132.227   <pending>       8080:31711/TCP   2s
Now we can use the minikube tunnel command to expose this service to the host machine:
➤ minikube tunnel
✅  Tunnel successfully started

📌  NOTE: Please do not close this terminal as this process must stay alive for the tunnel to be accessible ...

🏃  Starting tunnel for service hello-minikube1.
With the tunnel created by minikube, we can now access the service by using the localhost in host2:
➤ curl localhost:8080
Request served by hello-minikube1-7d547f95f4-zgbcw

GET / HTTP/1.1

Host: localhost:8080
Accept: */*
User-Agent: curl/8.1.2
Until now, we can see the service can be accessed from the host.